WARNING: This page is very outdated and should not be used for learning HTML. It only exists for archival purposes.
Well you are probably wondering, why everything says Monkey. Well basically, Monkey is an independent, uncertified, not able to do anything, really just here, company. So basically, we aren't even a company, so if your company name is really named Monkey, then Monkey is just a title to refer to us by. What you learn here is HTML, and HTML only. Why use this site? I don't know. It's pretty basic. I would use this site because I made it, and it doesn't have a lot of different pages. I basically just have about 15 sections, that are general, and you find what you are looking for, and you read that section. They are short sections, and fairly easy to follow.
If a file or picture needs to be placed in the code, I will put in "insert_file_here", or "insert_location_here" or "insert_image_here". Example would be <IMG SRC="insert_image_here">text you want to show</IMG>. As you can see, I'll use blue font, where code is conserned. I'll also use Italisize letters to indicate things like text you want here. I will have a little review code section, after each section. If you don't get it, you'll see what I mean, when we get started... speaking of which, let's get started! First off, here is a few downloads and links:
Downloads
This is a source code editor. You can write various source codes, including HTML. I use this for All my webpages.
Links
This is an HTML color code chart
Second. I have a table of contents here for you to use, if you just want to find information about a certain thing. After each section, there's a link that will take you back to here, for easier navigating, on this one page tutorial.
Table of Contents Just click on what you want to learn, and it will take you there.
You have everything you need, to make a homepage. All you need is a text editor, such as Notepad, for you Windows users. If you want something with color cordination, you may want to use CuteHTML, but that costs money, or you could use OmniPad, for free. Omnipad can be downloaded at the top of the page. Just open a document and just name your file name to call the file.html. It must have the ext .html. Just save it whenever you want as that same thing. Same thing if you are using Notepad. I highly recomend Omnipad, but it is impossible to find, except on this site. I googled for it and I can't find it anywhere, because the fellow who made it, doesn't have a site anymore. So I took my installer and put it up on the site.
First off, HTML is not case sensitive, meaning you can type the code: like this, LIKE THIS, or even, LiKe ThIs, BUT websites are. Meaning That if you want to link another website, you have to type their website as is. Also, files are case sensitive, so if you have an image that is called "Brak.JPG", you have to type it "Brak.JPG" and not "brak.jpg". Just files, and links have to be exact, the rest of the code can be <html>. Secondly, you could type the code in one line, but it is just easier to find stuff you want to edit later, if you skip lines, like in the examples I have provided, throughout the tutorial.
Ok, moving on. Now for code. The very first line of code has to have this: <HTML>. That is used to tell the browser that it is an HTML file... actually, I don't know, but that sounds correct. It's necessary. Also you will need to know how to end tags. It's quite simple. Ending tags is very important, because if you don't, your whole website could be just one huge link, or your website might be in all Bold letters, or stuffs of the sort. After all of your code, you need to end that <HTML>. To do this, simply add a "/". So it would look like this: </HTML>. This ends your webpage.
Our next order of business is your Heading. In your browser, in the top left hand corner, you should see the words: "Monkey HTML". Well this is your Title, of your webpage. You can make it whatever you want, but I would keep it simple, and make it tell the person, visiting your webpage, what your webpage is about. Like mine is about HTML, and I just wanted to put "Monkey" because I did that with the whole site. Anyways, to do this, your code needs to go like this:
<HEAD>
<TITLE>title of site</TITLE>
</HEAD>
So that is how you put a title to your site. So this is what your site would look like, if you did all this:
<HTML>

<HEAD>
<TITLE>title of site</TITLE>
</HEAD>

</HTML>
This concludes this section. Next is the review and then the next lesson.
Ok this is the main part of your site. Meaning everything other people see, will go within your Body. Like the Body of a paragraph, it is the main part. This is where your words are going to be showing up, and your images, and a lot of other stuff, that you put on your site for the viewing public. This is pretty long, but important, so let's get started.
Well your body tag looks like this: <BODY>, your ending looks like this: </BODY>. Ok, so you want a certain colored text for your webpage, and this is where you would put that. To do that just do this: <BODY TEXT="insert_color_code">. Now that you have the tag, you will need to know how to put in what color you want. Well, for blue, yellow, black, white, green, red, and common colors, just type that in the insert_color_code part. Each different color has a special code. For those not common colors, there is code. And to make it easy, go here to find the color.
Ok, now that you have gotten your text color, now time for that background. You can put a picture as your background, or you can just put in a color. To just make your background a color, do this: <BODY BGCOLOR="insert_color_code">. This should change your background color, to the color of your choosing. The color codes are the same as the text. What if you have an image, that you want to use as your background? Well the code for dat is: <BODY BACKGROUND="image_location.extention">. The .extionsion part is the file extenstion, like ".jpeg, .gif, etc". I hope you got it.
You also make the color of links, here. There are 3 different colors to a link: color of link when it hasn't been clicked yet, color of link when pressed, and color of link after it is pressed. That means there are 3 different codes. <BODY LINK="insert_color_code">, which is the color of link when it hasn't been clicked, yet. <BODY ALINK="insert_color_code">, which is the color of the link when it is being clicked. <BODY VLINK="insert_color_code">, which is the color of the link when it has been clicked. that basically covers it. So what will your code page look like so far? Let's take a look:
<HTML>

<HEAD>
<TITLE>title of site</TITLE>
</HEAD>

<BODY BGCOLOR="color_code" TEXT="color_code" LINK="color_code" ALINK="color_code" VLINK="color_code">

</BODY>

</HTML>
I'm going to be honest with you. If you understand all that, then the rest will be a peice of cake for you. This is probably the longest section, next to Audio.
As you probably notice, there would be nothing on your site if you just typed all that in, except your background color. So continue on down the line to find out about the things that you can put on a site. Let's review.
Ok, these are very useful, since you need text on a site. But to understand, I think I will just show you an example first:
This is what the paragraph tag does:
Basically it just skips a line between the lines,
and looks like this,
and the tag for paragraph is <P>.
This is an Example of a break:
Basically it is like hitting the return key,
and looks like this,
and the tag for a break is <BR>.
I hope showing you was more successful then trying to explain. I guess the question is, why do you need these two tags. The answer is if you want a return at a specific place, and not an automatic one (like it will do if you don't use these tags), then you use these tags. See in HTML, just pushing Enter or Return in your HTML code, doesn't make a Return in your webpage. I hope I was coherent. Sites are pretty much built upon these two tags, because they create new lines. In fact this site is full of them.
I hope this makes since. By the way, there is no need to end these. Why? Because people use different resolution (screen size) for their computers, so browsers automatically word-wrap websites, unless some code interferes with this... we'll get to that code later.
I've realize that I didn't put Centering anywheres, so I decided to put it here. It kind of doesn't belong here, but oh well. I couldn't think of anywhere else to put it. It's easy. You use this to center text, images, and objects(audio players, video players, applets, etc.). This is so easy, you are going to freak: <CENTER> and end with </CENTER>. End at the point of what you do not want centered. Let's see what this will do:
This is what centering does to text.
<CENTER>This is what centering does to text.</CENTER>
And that is the code for it. Easy.
Now, let's go to review code, because this is a short and sweet section
There are two kinds of lists: Ordered(numbered) and Unordered(bullets). Let's start with the Unordered.
Here's and example of an Unordered list:
In my Report, I talked about:
See they use bullets. The code for the Unordered List is <UL>, ands with </UL>.
Now let's take a look at an ordered list:
So far I've Learned:
Now they are numbered. The code for the Ordered list is <OL>, ands with </OL>.
So now that you know the code, how in blazes do you get the bullets or numbers in? Well you use <LI> tag, for each item you want in the list. Just place the tag between the UL or OL tags. Here's the code for the Ordered List:
So far I've Learned:
<OL>
<LI>HTML basics
<LI>Paragraphs and Breaks
<LI>Ordered and Unorder lists
</OL>
Note that you do not have to end the LI tags or put in Breaks. That is handy. I use it in my Table of Contents and in my Reviews. Speaking of which, that concludes this section, which means Review time.
Fonts. You can change the type, size, color, of the font. I guess the first thing we should talk about are Headings.
Heading fonts are Bolded and, range from 6 to 1. Different sizes, depending on which one. I'll just show you through this nice list:
Remember to end those, by puting a "/" like the rest of the tags we've ended.
I think you get the point. You use these for heading on Tables (we'll get to that later) or used at the top of your webpage, like my "Monkey HTML!". Theirs more to font then headings.
Ok, the long part to font. Color, Size, and Type of Font, will be explained at this point. To change thee color, the tag would look like this: <FONT COLOR="insert_color_cod">. Use the same color codes as backgrounds, and what not.
Now time for the size of font. This ones obvious, like the color. Here's the code: <FONT SIZE="insert_size">. Can you handle it? 3 is "normal" sized font, just to give you an idea of how big to make fonts. There is another code for size. That's point-size. What this is, is the size of font you see in Text Programs, such as Microsoft Word. Normal for Word, is about 12, where if you use SIZE normal is 3. So what is this code? It is: <FONT POINT-SIZE="insert_size">.
Now that size is done, let's take a looksie at TYPE. Type is what kind of font you want, such as Ariel, Times New Roman, etc. You get the point. Well to do this, just put in this: <FONT FACE="insert_type_font">. I think you got it. So here's an example:
<FONT COLOR="RED" SIZE="5" FACE="Helvetica">This is Helvetical font, in red, and size 5.</FONT>
That gets you this:
This is Helvetical font, in red, and size 5.
One more little section in Fonts. That is the Bold, Italics, Underline, and Strike out, words. This is easy. To make words Bold, you would put the code <B> </B>, or <STRONG> </STRONG>. There are two and they both do the exact same thing. This is bold font.
Italisize is simple, and also has two: <I> </I> or <EM> </EM>. Italisize looks like this
Underlining only has one, and it's easy: <U> </U>. This font is underlined.
Strike out words, are words that are striked out with a slash. Try to avoid, unless you want to make a point that the information isn't true, or something of that nature. Here it is: <STRIKE> </STRIKE>. This font is striked out
REMEMBER to end the Headings and the Bolds, Italisizes, Strikeout, and Underlines! It's easy to forget to.
Horizontal Lines are good for partitioning off a webpage. I did it on this page. All the blue lines or Horizontal lines. There's a couple of things you can do with these. First off, the basic tag is <HR>, which gives you this:
Oh but you can make it look better by making it smaller, by changing the width by: <HR WIDTH="size_in_pixels">. So the width is the size in pixels. Meaning if I put in <HR WIDTH="200">, it would be 200 pixels wide. Let's check this out:
Getting better. You can also align the line to the left or right. To do that just do this: <HR ALIGN="left_or_right">. Let's align it to the left, shall we, by putting in <HR WIDTH="200" ALIGN="RIGHT">:
Well, you can also change the thickness of the line. Simply by using this: <HR SIZE="size_in_pixels">. You can also put in a percentage, such as 75%, and it would take up 75% of the screen. Let's take make a line with this: <HR WIDTH="500" SIZE="10">:
Now, to make it look pretty, by adding color. That's simple: <HR COLOR="color_codes">. Let's make this: <HR WIDTH="500" SIZE="10" COLOR="RED">:
That's pretty much all for the lines. You don't have to end them. They are good for partitioning off websites. Here's how the code would look, at a closer look:
<HR WIDTH="size_in_pixels_OR_%" SIZE="size_in_pixels" COLOR="color_code ALIGN="left_or_right">
Let's review!
Tables are hard to understand, at first. After you get it, it sticks with you though. I remember, I didn't understand tables, at first and now I have a friend asking me about tables, and I'm like "Dude, that's easy." Ok, so, first off, what is a table? Well a table, is something that you can seperate items on the webpage... that was a horrible explanation. Let me show you:
|
Monkeys |
||
|---|---|---|
|
Monkey |
Chimp |
Gorrilla |
|
Baboons |
Spider Monkeys |
Spoon |
So that's a table. What are they used for? Well they come in very handy if you are making a website, and you want some words on the left side of the screen, while you want a picture to the right of the words. Or maybe, you want a row with links to the left, and a paragraph to the right. Stuff like that. Do you get what I'm saying? If not, heres an example.
Ok, now that you understand why to use them, now it's time for how to use them. Why is it hard to learn tables? Because there is a lot of code for them. Ok, so you need to know your 4 basic tags: <TABLE> and </TABLE>, starts your table, your <TR> and </TR>, which creates a new row, which is the horizontal way, and <TD> and </TD>, which creates a column in the TR tag, or up and down. The final basic tag is the <TH> and </TH>. This is the same thing as the TD tag, but it will center the text and bold it or center the image, the column. Tables are easier to explain with examples so here is an example, and it's code:
<TABLE BORDER="1">

<TR>
<TH>Pepsi
</TH>
<TH>Coke
</TH>
<TH>Random
</TH>
</TR>

<TR>
<TD>Mountain Dew
</TD>
<TD>Mellow Yellow
</TD>
<TD>I like Monkeys
</TD>
</TR>

<TR>
<TD>Dr. Pepper
</TD>
<TD>Pib Extra
</TD>
<TD>More random stuff
</TD>
</TR>

</TABLE>
|
Pepsi |
Coke |
Random |
|---|---|---|
|
Mountain Dew |
Mellow Yellow |
I like monkeys |
|
Dr. Pepper |
Pib Extra |
More random stuff |
So... that is a lot of lines of code, for just that. Like I said, you could type all that in one line, but it just makes it hard to find stuff in your HTML code document, and what not. Do you get what everything does now? I hope so. Now onto puting color do your table. The code to change the background color of the table is this: <TABLE BGCOLOR="color_code">. This would make your whole table that color. You can also just change the color of individual cells, by this: <TD BGCOLOR="color_code"> or <TH BGCOLOR="color_code">, depeding on which one you want to use. I think that is simple.
For the next trick is aligning the table in the center or to the right. By default it is to the left. The code is simple, it goes like this: <TABLE ALIGN="RIGHT_or_CENTER">.
Well by default, if you put text in your tables, they will be centered in the middle of the height of the cell... so if you have a lot of empty space in a cell, compared to the one next to it, it's not going to look very good. Here is what it would look like. Not very good, if you ask me. So to fix that, we use VALIGN. VALIGN will put the text, either on top of the cell, or at the bottom, depending which one you put in. So the code is this: <TR VALIGN="TOP_or_BOTTOM"> or <TD VALIGN="TOP_or_BOTTOM">. You can also use TH, but I got tired of doing that for each time something like that came along. So your table will looked a little better organized with that.
Our next venture is the border of the table. Well a lot of terms go into this, so I found this nifty picture, to explain what the terms are:
The first thing is the border. That is simple enough. The border is just the border around the Table. We can change the size and color of this bugger. To change the size, just do this: <TABLE BORDER="size_in_pixels">. I think you have it. To have no border just don't put in a BORDER or just put in a zero like this: <TABLE BORDER="0">. So to change the color, first you need to have a border, and then you would use this: <TABLE BORDER="size_in_pixels" BORDERCOLOR="color_code>. You get that? I hope you do.
I don't really use anything else from the TABLE tags, from that diagram, but they can come in handy, as you can see. So, I will teach you this stuff. So the cellpadding will be next. Cellpadding is space between the edge of a cell and the contents, as you can see in the diagram. I like that diagram. So the code for the cellpadding is this: <TABLE CELLPADDING="size_in_pixels">. I think the diagram got it explained of how it's useful, so moving on to Cellspacing. Cellspacing is space between cells. the code for this is: <TABLE CELLSPACING="size_in_pixels">. So there you go. Moving on.
VSPACE is the vertical space between table and surrounding text. Here's code for it: <TABLE VSPACE="size_in_pixels">. HSPACE is the horizontal space between table and surrounding text. Here's the code for that: <TABLE HSPACE="size_in_pixels">. If I went kinda fast on this section, it is because the diagram did a great job in showing you what they are, and I don't use these very often, however I recomend you do. Moving on then.
This brings us to our final lesson on tables: making them a certain size. Well that's easy. The code is this: <TABLE WIDTH="size_in_pixels_or_%">, to change the width, or for the height, it's just this: <TABLE HEIGHT="size_in_pixels">. You can also put in a percentage to the width of the screen, for WIDTH. That's not all you can change. You can change the size of the cells. To do that, just do this code: <TD WIDTH="size_in_pixels_or_%"> or <TH WIDTH="size_in_pixels_or_%">. So do HEIGHT on rows, just use <TR HEIGHT="size_in_pixels">.
I like to use tables, and they are highly recommended to use. They take awhile to get, and they are even harder to explain. I did it the best I could, but I have spent 4 hours just doing this section, so you can imagine, how sick I am of explaining tables... crap! I forgot one, very important thing: COLSPAN. I thought I was done. Well lets get COLSPAN done.
So basically COLSPAN is making a <TD> or <TH> span over certain amount of rows. In the Monkeys table (the first table I showed you, at the top of this section) "Monkeys" span over the 3 columns. You see it? See if you don't use COLSPAN, this is what will happen:
<TABLE BORDER="1">
<TR>
<TH>Pepsi
</TR>

<TR>
<TD>Mountain Dew
</TD>
<TD>Mellow Yellow
</TD>
<TD>I like Monkeys
</TD>
</TR>

<TR>
<TD>Dr. Pepper
</TD>
<TD>Pib Extra
</TD>
<TD>More random stuff
</TD>
</TR>

</TABLE>
|
Pepsi |
||
|---|---|---|
|
Mountain Dew |
Mellow Yellow |
I like monkeys |
|
Dr. Pepper |
Pib Extra |
More random stuff |
Ok, now let me explain how to do COLSPAN, and redo that example, up there, using COLSPAN so that "Pepsi" will span over the columns, instead of being like that. Ok so the code for COLSPAN is: <TH COLSPAN="number_of_columns">. Works with the TD tags, also, it just looks better with TH. "number_of_columns" is the number of columns, which in the previous example, we want 3. Alright, let's fix the code (I'll Italisize the COLSPAN part for easy looking.)
<TABLE BORDER="1">
<TR>
<TH COLSPAN="3">Pepsi
</TR>

<TR>
<TD>Mountain Dew
</TD>
<TD>Mellow Yellow
</TD>
<TD>I like Monkeys
</TD>
</TR>

<TR>
<TD>Dr. Pepper
</TD>
<TD>Pib Extra
</TD>
<TD>More random stuff
</TD>
</TR>

</TABLE>
|
Pepsi |
||
|---|---|---|
|
Mountain Dew |
Mellow Yellow |
I like monkeys |
|
Dr. Pepper |
Pib Extra |
More random stuff |
Sure the information isn't coherent anymore (because Mellow Yellow and Pib Extra aren't Pepsi products), but I was't going for coherency. I was going for poincy... not a word, who cares. I think you get the idea.
Now lets do something I like to call ROWSPAN. Rowspan is the same thing as COLSPAN, except it spans over the rows, vertically instead of horizontal. You would just use this: <TH ROWSPAN="number_of_rows">. Also works with the TD tags. So let's use the same example as before:
<TABLE BORDER="1">
<TR>
<TH ROWSPAN="2">Pepsi

<TD>Mountain Dew
</TD>
<TD>Mellow Yellow
</TD>
<TD>I like Monkeys
</TD>
</TR>

<TR>
<TD>Dr. Pepper
</TD>
<TD>Pib Extra
</TD>
<TD>More random stuff
</TD>
</TR>

</TABLE>
|
Pepsi |
Mountain Dew |
Mellow Yellow |
I like monkeys |
|---|---|---|---|
|
Dr. Pepper |
Pib Extra |
More random stuff |
The only difference is the ROWSPAN="2" and I took out a <TR> tag.
Now I will put the code to make a table, and then I will use every single code, that I can. I'm gonna hate this, so thank me.:
<TABLE BORDER="1" ALIGN="RIGHT" WIDTH="600" CELLPADDING="5" CELLSPACING="5" VSPACE="50" HSPACE="100">
<TR VALIGN="TOP">
<TH COLSPAN="3">Why I'm sick of teaching Tables
</TR>

<TR VALIGN="TOP">
<TD BGCOLOR=BLUE WIDTH="300">So pretty much, I hate this because I have wasted away more then 4 hours, to about 6 hours,
now. That's a really long time.
</TD>
<TD>Another thing is that this is officially the longest section of my tutorial. I said it was going to be
audio, but apparently, I lied.
</TD>
<TD BGCOLOR=RED>My other complaint is that my back hurts from being hunched over my keyboard.
</TD>
</TR>

<TR VALIGN="TOP">
<TD WIDTH="300">The good thing is that I have hopefully explained tables to you all. also I got to listen to music...
but then again I wasn't paying attention because I've been engrossed in this.
</TD>
<TD BGCOLOR=YELLOW>Now I have so much freaking review code to put in the review section.
</TD>
<TD>I like monkeys. This table has made me feel better. Now I'm not as mad.
</TD>
</TR>

</TABLE>
|
Why I'm sick of teaching Tables |
||
|---|---|---|
|
So pretty much, I hate this because I have wasted away more then 4 hours, to about 6 hours, now. That's a really long time. |
Another thing is that this is officially the longest section of my tutorial. I said it was going to be audio, but apparently, I lied. |
My other complaint is that my back hurts from being hunched over my keyboard. |
|
The good thing is that I have hopefully explained tables to you all. also I got to listen to music... but then again I wasn't paying attention because I've been engrossed in this. |
Now I have so much freaking review code to put in the review section |
I like monkeys. This table has made me feel better. Now I'm not as mad. |
I'm just gonna type a lot of crap here, to show you that HSPACE thing. Well I have my review to do. I hope I can finish most of the thing tonight. Well I need to eat food... gosh I forgot about food. Man It's like almost 7. Man. I'm kinda hungry. I need to make food. When it is cooking, I'll do the review section. Hopefully I won't be so intranced in this that my house will burn down. I still need more stuff to type. Holy crap. Ok. We are going to do this the fast way. Monkey. Monkey. Monkey. Monkey. Monkey. Monkey. Monkey. Monkey. Monkey. Monkey. Monkey. Monkey. Monkey. Monkey. Monkey. Monkey. Monkey. Monkey. Monkey. Monkey. Monkey. Monkey. Monkey. Monkey. Monkey. Monkey. Monkey. Monkey. Monkey. Monkey. Monkey. Monkey. Monkey. Monkey. Monkey. Monkey. Monkey. Monkey. Monkey. Monkey. Monkey. Ok that should be enough. Overkill in fact.
Ok I'm gonna go get my food cooking and then going to do the review, which is here.
This concludes the longest and hardest part of HTML. Thank you Lord!
So onto something a lot easier. A lot less time consuming on writing a tutorial. Inserting images. One tag, with 3 properties. Is that not easy? What are we waiting for then?
You can't have much of a website without images, so let's get this started. You can center images, put them in tables (another use for tables is having a webpage with pictures.). But first, you will need code: <IMG SRC="location_of_image.ext">. Ok, the "location_of_image.ext" means location of image.extension. an extension is like .JPEG, or .GIF, or .PNG. I'm sure you've seen those. If you put the image in the same folder of your webpage, all you have to do is put the_name.ext. But if it is in another folder, you have to specify, where. Got it? Good. Here's and example:
<IMG SRC="brak.jpg">

So there you have the basic element of creating an image. So now let's see if we can minipulate the properties. As I said before, you can center it, using center tags(<CENTER><IMG SRC="location_of_image.ext"></CENTER>), but there is more. You can change the size by using these tags: <IMG SRC="location_of_image.ext" WIDTH="size_in_pixels">. This changes the width, while to change the height you use: <IMG SRC="location_of_image.ext" HEIGHT="size_in_pixels">.
WARNING! Changing the size to a bigger size then the picture, distorts it! Change if it looks good is a good tip
Let's make brak bigger, to make my point... 200x150 pixels. so the code would be <IMG SRC="brak.JPG" WIDTH="200" HEIGHT="150">
You can also make it smaller, if you would like. Note the bluriness from going big.
Ok there is something else you can do with images. This is called alternate text. Meaning if the picture cannont be showed for some reason, it will show the text in the alternate. Another thing that does is for, Internet Explorer, sorry not Firefox (I love you), is if you hover your mouse over it, it will display that text, also. So what is this magical code? This: <IMG SRC="location_of_image.ext" ALT="text_you_want">. Obviously, text you want is text you want. I'll put up three examples, one will be normal, one won't exsist, and one will be there with the alt text.


To conclude, I will just tell you that you can also use the fallowing that were used in Tables:
You use them the same way you would use them in a Table. Thee end.
Links can be to other pages, to make an email, to someone, or to link to another part of the same page(such as my Table of Contents). Links to other pages is easy as pie. The code is <A HREF="http://www.websitename.end">text to be the link</A>. Ok so the http stuff is obviously the webpage you want it to load. If the webpage is in the same folder as the webpage you are typing, then you just need the name of the webpage.html, or whatever the ext is. Ok that makes it so it loads the page in the same window... what about making it open in a new window? Well that's easy: <A HREF="http://www.websitename.end" TARGET="_BLANK">. Here's an example:
<A HREF="http://www.homestarrunner.com" TARGET="_BLANK">Homestar Runner</A>
That should open up in a new window to www.homestarrunner.com.
There are other TARGET attributes, but they are located in "Monkey Frames".
So now that is out of the way, how about emails?
Email code is a wee bit longer... take a looksie:
<A HREF="mailto:youremailaddress">text to be the link</A>.
Simple, but you can do more. You can have the subject put in for them when the click on the link:
<A HREF="mailto:youremailaddress.com?subject=subject_name">text to be the link</A>
One more thing. Not only can you fill in there Subject, but you can put in their Body! Holy crap! Let's take a looksie:
<A HREF="mailto:youremailaddress.com?subject=subject_name&body=words_for_body">text to be the link</A>
I would advise against the body thing, but subject is good. NEXT!
Links to things on the current webpage. A good example is my Table of Contents. So how do you do it? Well the words you want to be a link, such as Table of Contents, needs to have this around it: <A HREF="#name_it_anything">text or image to be the link</A>. Now that you have done that, you need to call something that name, you named... anyways. To do this, go you the spot you want the link to take you, and then do this: <A NAME="name_as_before">text or image you want link to go to</A>. Here, let me show you my code for the Table of Contents:
<A HREF="#STARTED">Monkey Starting HTML</A>
<A HREF="#BODY">Monkey Body</A>
<A HREF="#PandBR">Monkey Paragraphs and Breaks and Centering Objects</A>
<A HREF="#LISTS">Monkey Lists</A>
<A HREF="#FONTS">Monkey Fonts</A>
<A HREF="#LINES">Monkey Horizontal Lines</A>
<A HREF="#TABLES">Monkey Tables</A>
<A HREF="#IMAGES">Monkey Images</A>
<A HREF="#LINKS">Monkey Links</A>
obviously, I took out the List code. But yeah. And to do the text I want to go to, I do this:
<A NAME="STARTED">Monkey Starting HTML</A>
That names "Monkey Starting HTML" "STARTED", so when Monkey Starting HTML, in the Table of Contents is clicked, it goes to the line of code with name "STARTED". Got it? Good.
Another attribute of Links is <A TITLE="text_you_want_to_say"> tag. This allows you to have a little box, that says whatever you want it to say, when the link is hovered over by the mouse. Let's take a look:
<A HREF="www.homestarrunner.com" TITLE="This is a title">Hover over me!</A>
If you hover over the Link, it should bring up a little thing that says "This is a title". The idea behind this is the little box gives a little deeper description, then the URL.
That's it. REVIEW!
I've come up with a review test. You know to test your skills. I won't be grading you, heck I won't even see it. So if you cheat, you are only cheating yourself. I just want to make you see how much you know, now.
There are 2 tests: One you will just copy the code, and hopefully study it, and the other one, I will give you guidelines, and what it should look like after you complete it.
|
Your first test will be this: You will have to copy the code, that is in an image (so you can't copy and past).
|
For this test, you will be given what a webpage looks like (in image form) and some special guidelines. I will supply any images, required and will tell you where they are located. This is pretty hard. I wish you the best of luck. Here she is. |
I hope you guys don't abuse the tests, like cheating, because you are only cheating yourself... I'm serious, because you are the only one looking at it, because I am not going to look at them and give you a freaking grade. I think the second test is a good one for people that think they are advance in their HTML skills. I mean it doesn't require you to be an expert, that's for sure, but it is a good test to see if you can do it. Well enough. Now that you know the basics of this thing called HTML, I'm going to talk about more advance stuffs.
Special tags, are tags that allow you to do special things. Or better put, they allow you to use special characters. For instance, you can't just type a Less then or Greater then symbol, because HTML uses those for tags. So you need to use special code. Special tags use the "&" sign. I'll just list them and their code.
| Char | Description | Entity Ref |
|---|---|---|
| < | Less than | < |
| > | Greater than | > |
| & | Ampersand | & |
| Nonbreaking space | | |
| ¦ | Broken Vert Bar | ¦ |
| Punctuations and Refs | ||
| " | Quotation Mark | " |
| ¡ | Inverted exclamation | ¡ |
| ¿ | Inverted question mark | ¿ |
| · | Middle dot | · |
| « | Left angle quote | « |
| » | Right angle quote | » |
| ¶ | Paragraph sign | ¶ |
| § | Section sign | § |
| © | Copyright | © |
| ® | Registered trademark | ® |
| ™ | Trademark | ™ |
| • | Bullet | • |
| Diacratics without letters | ||
| ¨ | Umlaut | ¨ |
| ¯ | Macron accent | ¯ |
| ´ | Acute accent | ´ |
| ¸ | Cedilla | ¸ |
| | Soft hyphen | ­ |
| Letters with diacriticss | ||
| À | Capital A, grave accent | À |
| à | Small a, grave accent | à |
| Á | Capital A, acute accent | Á |
| á | Small a, acute accent | á |
| Â | Capital A, circumflex accent | Â |
| â | Small a, circumflex accent | â |
| Ã | Capital A, tilde | Ã |
| ã | Small a, tilde | ã |
| Ä | Capital A, dieresis or umlaut mark | Ä |
| ä | Small a, dieresis or umlaut mark | ä |
| Å | Capital A, ring | Å |
| å | Small a, ring | å |
| Æ | Capital AE dipthong (ligature) | Æ |
| æ | Small ae dipthong (ligature) | æ |
| Ç | Capital C, cedilla | Ç |
| ç | Small c, cedilla | ç |
| È | Capital E, grave accent | È |
| è | Small e, grave accent | è |
| É | Capital E, acute accent | É |
| é | Small e, acute accent | é |
| Ê | Capital E, circumflex accent | Ê |
| ê | Small e, circumflex accent | ê |
| Ë | Capital E, dieresis or umlaut mark | Ë |
| ë | Small e, dieresis or umlaut mark | ë |
| Ì | Capital I, grave accent | Ì |
| ì | Small i, grave accent | ì |
| Í | Capital I, acute accent | Í |
| í | Small i, acute accent | í |
| Î | Capital I, circumflex accent | Î |
| î | Small i, circumflex accent | î |
| Ï | Capital I, dieresis or umlaut mark | Ï |
| ï | Small i, dieresis or umlaut mark | ï |
| µ | Micro sign | µ |
| Ñ | Capital N, tilde | Ñ |
| ñ | Small n, tilde | ñ |
| Ò | Capital O, grave accent | Ò |
| ò | Small o, grave accent | ò |
| Ó | Capital O, acute accent | Ó |
| ó | Small o, acute accent | ó |
| Ô | Capital O, circumflex accent | Ô |
| ô | Small o, circumflex accent | ô |
| Õ | Capital O, tilde | Õ |
| õ | Small o, tilde | õ |
| Ö | Capital O, dieresis or umlaut mark | Ö |
| ö | Small o, dieresis or umlaut mark | ö |
| Ø | Capital O, slash | Ø |
| ø | Small o, slash | ø |
| ß | Small sharp s, German (szligature) | ß |
| Ù | Capital U, grave accent | Ù |
| ù | Small u, grave accent | ù |
| Ú | Capital U, acute accent | Ú |
| ú | Small u, acute accent | ú |
| Û | Capital U, circumflex accent | Û |
| û | Small u, circumflex accent | û |
| Ü | Capital U, dieresis or umlaut mark | Ü |
| ü | Small u, dieresis or umlaut mark | ü |
| ÿ | Small y, dieresis or umlaut mark | ÿ |
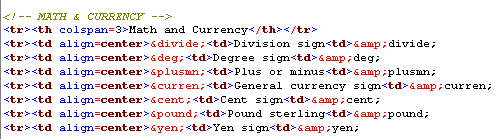
| Math and Currency | ||
| ÷ | Division sign | ÷ |
| ° | Degree sign | ° |
| ± | Plus or minus | ± |
| ¤ | General currency sign | ¤ |
| ¢ | Cent sign | ¢ |
| £ | Pound sterling | £ |
| ¥ | Yen sign | ¥ |
| ∞ | Infinite sign | ∞ |
| ² | Squared | ² |
| ³ | Cubed | ³ |
| √ | Squareroot | √ |
Thanks to the creators of http://www.natural-innovations.com/boo/doc-charset.html, from which this table was culled.
*I added some more, but there are even more, but I decided to put the most useful.
I decided to just copy and paste this table, instead of just writing it all out for you. I've edited it, sorted it into sections so if you are looking for a certain one, you can look under the catagory. Here's an example, in case you don't understand fully:
®
®
Next would be the Comment. First off, a comment is something that you can see while veiwing or editing an HTML page, but the browser will skip over it, so people who are veiwing the webpage cannot see it. It's useful to keep your HTML code organized. Let me show you how it works.
So basically, I'll just give you an example:
In the table above, with the special tags, they are organized into categories. Well, in the code, Comments were used, and this is what it looks like:
The <!-- MATH AND CURRENCY --> is the comment. It is only colored like that if you have an HTML editor, like OmniPad or CutHTML. Basically comments are used to help keep your webpage organized. Comment code is this:
<!-- text_you_want -->
It's a great way to put a comment to yourself, that you don't want anyone to see, but yourself.
Section Done!
So welcome to PopUps and Alerts. This section will go into manipulating windows properties, such as pop up windows, controling the size of windows when a link is clicked, controling other aspects of the window. First let's start with some alerts.
Alerts require the tag <A HREF="site" onClick="alert('text_you_want')">link_text</A>. Alerts will open before, going to the page specified. Let's see it in action:
<A href="monkey.html" onClick="alert('This is an Alert')" target="_blank">Alert</A>
Alert
Basically, that's all. Most alert windows use Javascript, or other forms of code, so for HTML, that's all. Let's move on.
All the rest will use a little property called "open()". We'll be manipulating the same page each time. First, the width and the height of the window. The tag would look lik this: <A HREF="whatever" onClick="window.open('page_to_open','name','HEIGHT=height,WIDTH=width')>link_text</A>. As you can see, it doesn't really matter what you put in the "href" section. Just put the page address in the "page_to_open" spot. Let's see an example:
<A href="#" onClick="window.open('popup.html','PopUp','HEIGHT=200,WIDTH=300')">PopUp</A>
PopUp
The bad deal about this, is that it returns to the top of the page, but I added a little code in the link so that it won't do that. the code I added is <A href="#" onClick="window.open('popup.html','PopUp','HEIGHT=200,WIDTH=300'); return false;">PopUp</A>. I italisized the changed part. As you can see that I just put a "#" symbol in for the href. It doesnt matter what you put there. Here, I'll break down all the code.
"popup.html" is the page it will open. "PopUp" is the name I gave the window. This pertains to Script, mainly. Obviously, width and height is width and height. "return false" makes it so that the current webpage doesn't refresh the page so that is scrolled to the top. You get all that? Read it again if you didn't, or just send me an email. My email is somewhere on this page.
Spacers are things that will create empty space. For instance, If you wanted to space your page out a little bit. Some people have done this using an "empty image" which is just an image with the same color of backround, and they use the IMG tag. But there is an easier way. The <SPACER> tag. This is probably the most useful to make indents on your webpage, since you can't indent on webpages. Unfortunately, most web browsers don't support it. There are 3 kinds of Spacers, and only Mozilla Firefox, supports one. Firefox, supports the Block Spacer, which is really all you need. Then again, a lot of people use Internet Explorer, and that doesn't support any Spacers. So I'm gonna tell you Block Spacers, but I don't recomend using them, but I do wish browsers would support it.
The Block spacer. The code for that is: <SPACER TYPE="BLOCK" WIDTH="size" HEIGHT="size">. I'll give you an example:
I like peas
That is a spacer with 100 width and 100 height. The code is this:
<SPACER TYPE=BLOCK WIDTH=100 HEIGHT=100>
And that's basically all. This could also be good to use as indents. Just put in "WIDTH=50" and no height, and there ya go.